


1. What are the most common nail shapes?
Nail shapes have become an integral part of self-expression and personal style. From the classic to the trendy, here are some of the most common nail shapes you'll encounter.

1.1 Square
The square nail shape is the round nail shape’s closecousin.However, simply file your nail straight across the edge to give it a square look, If you do n’t suppose the rounded edge is right for you. Square is one of the stylish nail shapes for long and slim fritters.
analogous to the round nail shape, the square nail shape works well with simple nail polish, shimmer, or patterns. Accentuate the angles of the square nails with perpendicular and vertical lines-work for a bold and simple nail look.
1.2 Round
This is the perfect nail shape for folks who like to keep it redundant and simple. suppose of the round nail shape as your natural nails, but slightly elevated. They're easy to achieve since they follow the natural roundness of your nails. Keep your nails short( just over the nail bed), and round the edges with a nail train.
Rounded nails look best with a solid base fleece and a shimmer greatcoat or small nail symbols in a pattern. Keep the theme of simplicity going by using shapes like stars to embellish them or by exercising negative space on the nail to give them a high fashion look. The round nail shape gives hands a womanlike touch incontinently and makes your fritters look slightly longer.
1.3 Oval
Oval nails are the aged family to almond and round nails. With a delicate fraction tip, this nail shape requires some length–thick medium to long for a length thing. Besides keeping a nail strengthener on your nails to cover them between polishes, you ’ll need to keep a train on hand to keep the sides filed neat and the edges rounded and indeed.
This nail shape is stylish paired with a color that emphasizes its femininity. Try soft pinks, blues, and other light colors!
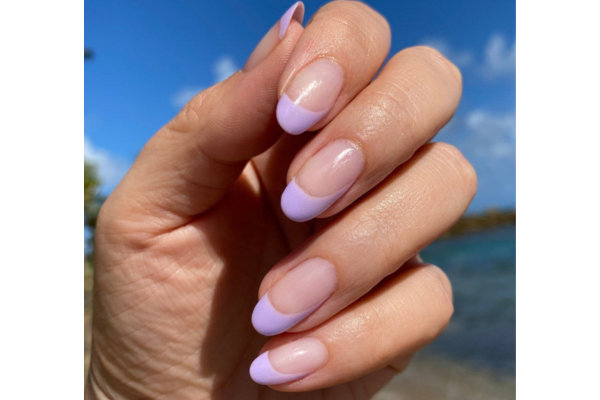
1.4 Almond
The almond nail shape is slender, womanlike, and enough. analogous to a factual almond, once the nail extends out from the nail bed, it's phased inward to a point like stiletto nails minus the sharp tip. Almond nail shapes have rounded tips giving it an important softer look than the stiletto nail shape.
This nail shape looks great both on short and long nails, being especially a perfect choice for all those that want to produce the vision of slimmer fritters. Brace almond nails with soft, womanlike colors and flowery nail designs and other naturescapes.
>>> Read more: Tweezer and nail clipper set
2. How to shape almond nails
Almond nails are a popular choice for those looking to achieve an elegant and sophisticated look. If you're interested in shaping your nails into the almond form, here's a step-by-step on how to shape almond nails.
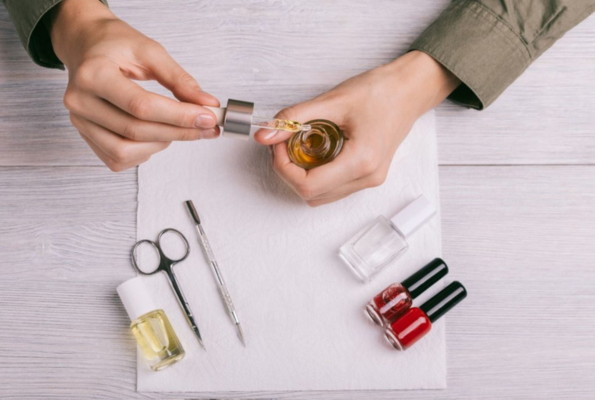
2.1 Tools and materials
Shaping your nails into the almond form requires the right tools and materials to achieve a polished and professional look. Here's a list of essential tools and materials you'll need.
Tools:
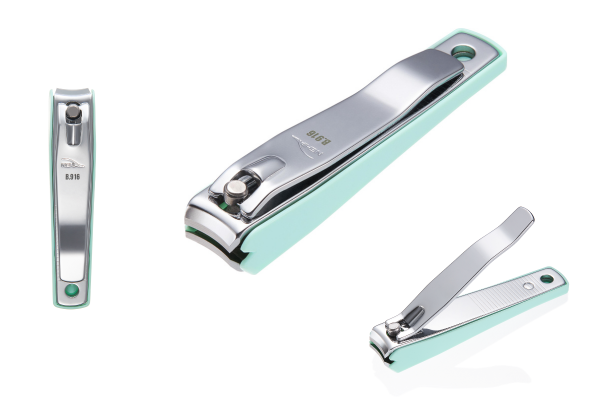
- Nail clippers: These are useful for trimming your nails to the desired length before shaping.
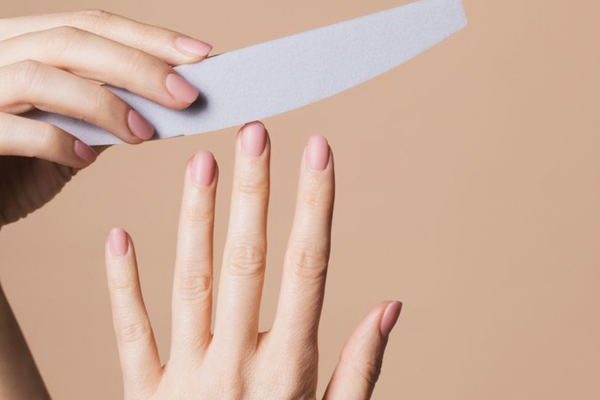
- Nail file or emery board: A nail file with a fine grit or an emery board is essential for shaping and refining the almond shape.
- Buffing block: This tool helps to smooth the surface of your nails and remove any rough edges for a polished finish.
- Cuticle pusher or orange stick: Use a cuticle pusher or orange stick to gently push back your cuticles, creating a clean and neat nail shape.
- Nail polish remover: This is necessary for removing any old nail polish and cleaning your nails before shaping.
- Small brush: A small brush dipped in nail polish remover can be used for cleaning up any excess polish or mistakes during the manicure process.
Materials:
- Nail polish: Choose your favorite nail polish color to apply after shaping your nails. You can opt for a classic shade or experiment with trendy colors to complement your almond-shaped nails.
- Nail strengthener or base Coat (Optional): Applying a nail strengthener or base coat before nail polish can help protect your nails and make the polish last longer.
- Top coat: A top coat is essential for sealing and protecting your manicure, preventing chipping, and adding shine to your nails.
- Nail care products (Optional): Consider using cuticle oil or hand cream to moisturize and nourish your nails and cuticles, keeping them healthy and hydrated.
Having these tools and materials on hand will make the process of shaping your nails into the almond form easier and more enjoyable. Remember to choose high-quality products and tools to achieve the best results and maintain the health and beauty of your nails.
2.2 Preparation
Preparing your nails properly before shaping them into the almond form is crucial for achieving a clean and polished look. Proper preparation ensures that your nails are healthy, clean, and ready for shaping. Here's a step-by-step guide to nail preparation:
Remove old nail polish:
- Begin by using nail polish remover to completely remove any old nail polish from your nails. Make sure to use a non-acetone remover if you have acrylic or gel nails.
Clean your nails:
- Wash your hands thoroughly with soap and water to remove any dirt, oil, or residue from your nails. Dry your hands and nails thoroughly with a clean towel.
Trim your nails:
- Use nail clippers to trim your nails to your desired length. If you prefer, you can also use a nail file to shape the length of your nails. Aim for a length that is slightly longer than the desired almond shape to allow for shaping and filing.
Smooth the edges:
- Use a buffing block to smooth out any rough edges and create a smooth surface for shaping. This step helps to prevent snagging and breakage while shaping your nails.
Push back cuticles:
- Gently push back your cuticles using a cuticle pusher or orange stick. This will create a clean and neat nail shape and make it easier to shape your nails into the almond form.
Clean underneath nails:
- Use the pointed end of a nail file or an orange stick to gently clean underneath your nails and remove any dirt or debris.
Apply nail strengthener or base coat (Optional):
- If you prefer, apply a nail strengthener or base coat to protect your nails and help the polish adhere better. Allow it to dry completely before moving on to shaping your nails.
Prep your workspace:
- Set up a comfortable and well-lit workspace with all your tools and materials within reach. This will make the shaping process easier and more enjoyable.
By following these preparation steps, you'll ensure that your nails are clean, healthy, and ready for shaping into the elegant almond form. Proper preparation sets the foundation for a flawless manicure and helps to maintain the health and beauty of your nails.
2.3 Shaping the almond form
Shaping your nails into the almond form requires precision and patience to achieve the elegant and elongated shape characteristic of almond nails. Follow these steps to shape your nails into the almond form.
Start with the base:
- Begin by shaping your nails into an oval shape. File the sides of your nails at a slight angle to create the tapered almond shape. Aim to create a soft and rounded base that tapers towards the tip.
Taper the sides:
- Using an emery board or nail file with a fine grit, gently file the sides of your nails to create a tapered, almond-like shape. Hold the file at an angle to achieve the desired almond shape. Make sure to maintain the rounded edges and pointed tip characteristic of the almond shape.
Refine the shape:
- Continue to file and shape your nails, paying close attention to the symmetry and balance of the almond shape. Use gentle and smooth strokes to refine the shape and ensure a smooth transition from the base to the tip.
Check for symmetry:
- Regularly check the shape of each nail to ensure symmetry and uniformity across all nails. Compare the shape and length of each nail to achieve a cohesive and balanced almond shape.
Smooth the surface:
- Use the buffing block to smooth the surface of your nails and remove any rough edges. This step helps to create a polished and professional finish for your almond-shaped nails.
Clean underneath nails:
- After shaping, use the pointed end of a nail file or an orange stick to gently clean underneath your nails and remove any remaining debris.
Moisturize and hydrate:
- Apply cuticle oil or hand cream to moisturize and hydrate your nails and cuticles. This step helps to nourish and strengthen your nails, keeping them healthy and promoting growth.
Apply nail polish (Optional):
- If you prefer, you can apply your favorite nail polish color to complete your almond-shaped nails. Choose a color that compliments your skin tone and style to enhance the elegance and sophistication of your almond-shaped nails.
3. Conclusion
Mastering the art of shaping almond nails can elevate your manicure game, adding elegance and style to your look. With the right techniques and attention to detail, anyone can achieve flawless almond-shaped nails. Remember, practice makes perfect. Embrace the almond shape, follow the steps outlined as Nghia Nippers guided how to shape almond nails above, and soon you'll be shaping almond nails like a pro, showcasing a manicure that reflects your unique style and sophistication.
>>> Read more: Top 9 Best Nail Clippers in 2024


